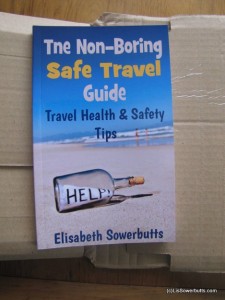
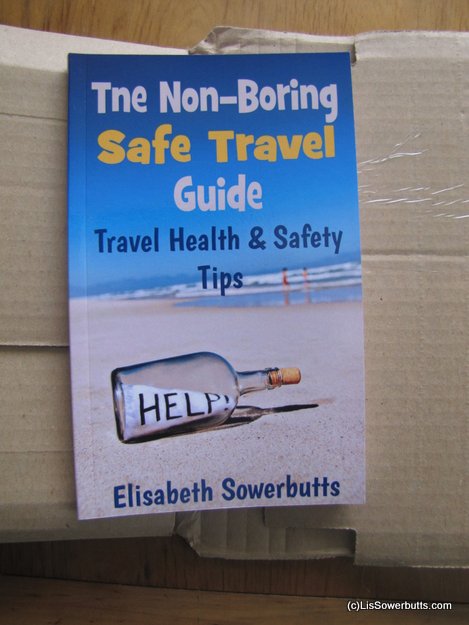
This post was prompted by an online colleague who admitted that he has been avoiding paper versions of their books because he was scared of the formatting.
The formatting is pretty darn easy actually, well at least for Amazon’s CreateSpace which is the service I’m using. Much more straightforward than doing the e-version in my experience.
What You Need To Get Started
1. An account with createspace – sign up fill in the form – done.
2. A formatted book. If you used my method for Formatting Non-Fiction books, then you will have an HTML file and some images.
3. A cover image.
At The End Of The Process You Will Have
 1. A book cover which includes the back cover – I’ll probably do another post on this but basically you create the correct size (and it varies with the number of pages in your book) upload the jpg to Createspace and they will create a pdf of the cover for you.
2. A PDF of the book.
3. Once you upload these two, Createspace will send you back a PDF proof copy which will print on standard printer paper “2-up” so you can see the actual layout. Alternatively, and obviously at some cost, you can also order a print proof copy. It’s a good idea to do this for the first one. That way eventually you will notice the obvious typo on the cover!
Self-Publishing A Print Book With Amazon’s CreateSpace
1. Front Matter
Go find a a real book in your genre. You’ll find these in a book shop, or a library. Look at all the extra pages there are at the front of the book. There are a surprisingly number of them. I flipped through quite a few and I ended up adding:
- half title page i.e. just he title;
- More books in the series page (optional but you will need a blank page because the next page must be on the right);
- full title page includes title, sub-title, author name and url of the “publisher”;
- copyright page, including date, edition number and ISBN;
- disclaimer;
- blank page to ensure that the table of contents start on the right page.
This is not set in stone, but I intend my books to be consistent. Often trad published books have heaps of reviews at the front, as a reader I find these incredibly annoying so I didn’t add them!
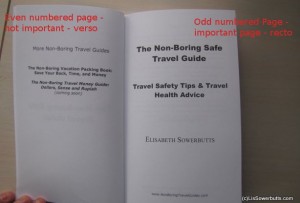
Verso and Recto
What you have no idea what verso and recto pages are? Me neither, but if you write your language from left to right: verso is the page on the left, recto the page on the back, if you are writing Hebrew or Arabic, it will be the opposite (full explanation).
To keep it simple – the important shit like the start of the book, the start of the table of contents, the start of chapters MUST go on the right side (recto) of the opened page – like this:
2 Back Matter
I used the end of the book to advertise other books in the series by including a blurb. I already had an about the author page and a request for readers to leave a review and signup for updates.
Re-Formatting From eBook to pBook
Workflow matters to traditional publishers and typesetters (that’s a formatter in the paper world). There’s a reason for that – it saves a lot of mistakes and re-work if you know exactly what file is at what stage. I suggest that you set up draft and final version folders and have sub-folder for every version of your book (ePub, Kindle, Paper etc).
Take your final HTML as used to create your eBook and import it into your word processor. Mine is OpenOffice which allows me to save PDF files directly, so that’s what I’m talking about from here on in.
Go to Createspace and download the doc template for the book size that you’ve chosen. There is no right answer for this, I chose 8″x5″ because my book is quite short so I wanted it to not look too skinny.
Now learn how to use “Page Styles” (F11 in Open Office). You need to use Page Styles, and know how to change from one to the other so that you can:
- ensure no header/footer shows on blank pages, and title and other similar pages;
- pages numbers don’t usually start displaying until the actual text start – my first page with a number is a page 9. If you have a long introduction and table of contents you can number these with small roman numbers but I thought that looked a bit old-fashioned;
- you can use page styles to change the running head to reflect the current chapter, and you should for non-fiction.
Fonts and Justification
I didn’t like the suggested CreateSpace font (Georgia) that much and changed to Palatino Linotype for the majority of text. You can use different fonts and sizes for the front matter and chapter headings, but keep it fairly simple.
Note different fonts make a large difference to how many pages your book will consist of. More pages means more cost to the reader, but on the other hand using a minute font, is not going to win you friends and readers either. Decide on your font before you fiddle with the page breaks.
Books are fully justified. Yeah, I’d forgotten too. But they are – you don’t see ragged right alignment except maybe in a poetry book. You may find that you have some oddly spaced words because of it, usually means you need to add some extra spaces.
Margins and Gutters
The Createspace template will give you the required margins. Note that books are “mirrored” because of the gutter at the spine – so pages will not look symmetrical – if they are symmetrical the book will look awful. It will also come with suggested fonts and sizes.
Add in the front and back matter you’ve decide your book needs.
The CreateSpace template has a number of pre setup page formats which I adapted for my own purposes.
Now you need to add back in headers and footers including page numbers. Again the format is up to you, but most non-fiction books seems to have a the title on the right page and a running chapter or part heading on the right.
Page Breaks
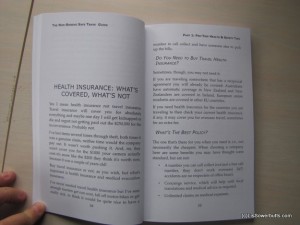
With paper books page breaks are critical, the exact opposite of ebooks. Your word-processor will have widow/orphan control (to prevent only a one line appearing on a new page), but got a better result by going through and doing this by hand. As you do this you may end up needing to add blank pages if you want major sections to start on the right side page.
Images
Images cost money – and unless you have black and white images they will cost you a lot of money
Final Steps To Printed Glory
Once you think you are getting close create a pdf (save as PDF in open office) and see what it looks like. If you think you are getting close, then upload it as your “interior file” to createspace. This will give you the chance to seee the interior pages in their online reviewer. Well worth clicking through this as it will find you lot’s of errors such as headers on the wrong side (well it did for me).
You can do this any number of times and it only takes a few minutes to upload a new version.
Once you are REALLY happy then work your way through the rest of the createspace process and hit submit, including adding the cover image. You will get a message saying that your book will approved (or not) within 48 hours (more like 24 in my experience). What you will get is either an email telling you what the problems are that your book is ready for you to approve the proof.
Accepting the Proof – It’s Your Choice
Up until now it has cost exactly nothing to create your book now you have a choice:
- approve the PDF file they’ve sent to you (this is not the same as the one you submitted to them), or
- order the proof copy
The second option will cost you the price of the book, plus P&P – in my case to New Zealand it cost around US$10 to get the book in my hands and 2 weeks of waiting. It should be quicker and cheaper for the rest of you.
You don’t have to do that – you can just download the PDF proof and print it out. Yes you can also proof the PDF on screen, but I wouldn’t – you won’t see the errors!
Printing the file will give you a two -up layout view with the verso and recto stuff sorted out correctly. Compared to the printed book proof, and despite having printed the 8″x5″ proof on metric equivalent paper, it’s a good representation. Won’t help you with the cover of course, but the rest of the book is a close as possible to the reality.
Now you repeat the process a few more times and get the rest of the mistakes sorted out!
Note until you approve your book it’s not available for general sale.
Once you have approved it – you can still change it, but you will need to go through the proof approval process – and if you opt to pay for extended distribution you will need to pay that fee again for each new “edition” you create, even if it’s just to fix typos.
It’s really not that hard, because it’s easy to see exactly what your book will look like on paper. The tricky thing is that an awful lot of stuff that ignore with eBooks, become critical with printed books: fonts, margins, blank pages for starters.
So what’s your story – have you produced a printed version of your self-published book? How did it go?


9 replies on “Formatting for Self-Published Paper Books with Amazon – Not So Hard”
Thankyou for this, very helpful, I have been receiving guidance to write a book about he financial blowout of America, it’s now almost finished, my next step is the formatting, glad you describe it as pretty darn easy because I’m terrified, guess it’s due to ignorance though, fear of the unknown.
I am very happy to read your article .I don’t know how I say my heartiest thanks to you.I am waiting to read more from you .thanks for sharing
Excellent, that answers many of my questions I had. Remains one: Do you need an ISBN number and if yes, how do you get one? SY
Yes you need an ISBN – you can provide your own or use one assigned from CS – I just used one assigned – because really I don’t have a problem with CS being the publisher of record. It’s a hugely controversial issue for some but, I just go the path of least resistance.
Thanks Lis, perhaps that would be worth to write another article about? The pros and cons of having your own ISBN or using one via CS? SY
I hope a lot of people get to read this post, it helps/explains a lot……I think you answer the most commoin questions ! One i’ve just thought of though is how do you get an ISBN number? What’s the process?
Fern -if you want to get your own ISBN it depends on where you live -just google getting ISBN in – for Americans its bowker.com I believe.
Lis, just write an article about it, you see there is a demand regarding that 😉 SY
Thanks Lis, perhaps that would be worth to write another article about? The pros and cons of having your own ISBN or using one via CS? SY